December’s Block is Polka Dot
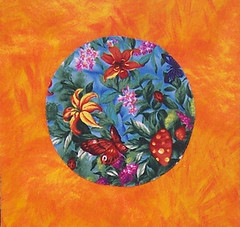
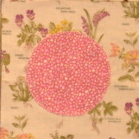
Our block for December is Polka Dot. Michelle made this pretty example.
According to Brackman’s Encyclopedia of Pieced Quilt Blocks, our December block, Polka Dots, was first published in 1958 in a booklet titled Easy Quilts (#3500), by Aunt Martha Studios.
This block is a good introduction to curved/circle blocks, but is pretty quickly made using one of several techniques–check out the links to various pattern options and use your favorite or S*T*R*E*T*C*H and try something new.
Fabric Guidelines
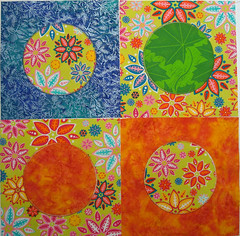
This month the fabric is qulter’s choice. For this block, you may use any two fabrics (quilting cottons) of your choice. If you make multiple blocks, you can repeat fabrics as long as each fabric pair combination is unique. Debbie’s four blocks all share one common fabric, which is OK . . . but the bottom two are made from the same fabric pair which is NOT OK (sorry, Debbie).
Block Pattern Options
There are several pattern/technique options for constructing the block. Whichever you choose, your block should end up looking like a 4″ (finished size) circle, centered upon a 6.5 inch square.
- The original pattern is made from 4 identical drunkards path units and you can make it this way if you choose. Templates and instructions for this method can be found on the McCall’s quilting site, here: Drunkard’s Path. To make the Polka Dot block, you’ll need to cut only FOUR of each template and the resulting block will consist of the CENTER of this block.
- You can also choose appliqué and simply applique a 4″ diameter (finished size) circle on the 6.5 inch background–if you choose this method, you might want to cut the background slightly larger and square-up and trim to size after the appliqué. Notes for preparing circle appliqué can be found on my Blocks-n-Swaps blog here: Preparing Circular Elements for Appliqué. If you choose appliqué, you may use this or your own favorite technique, as long as the edges are turned under. No raw-edged appliqué this month, please.
- Another way to create this block is to insert the circle. Sharon Schamber calls her version of this technique Piecelique and you can find step-by-step directions here: Curved Quilting Technique. You will need to create the freezer paper template–less complicated than Sharon’s example, just a 6″ square with a 4″ circle in the center.
Here are some of the blocks from sneak peekers Barbara, Debbie and Michelle–thanks ladies for finding the time to provide this inspiration:


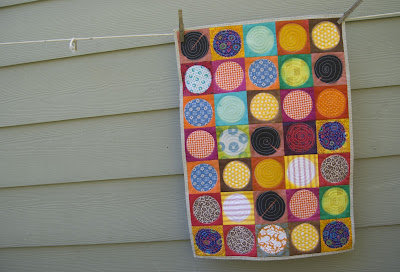
And for some more inspiration, here is a finished quilt.