Tips for Resizing Patterns for the Star Block Challenge
 Today I made my block for the Star Challenge. I remembered that my original idea was to make a block from the sketch that would become last month’s Sunrise block and now that I had a pattern, it was pretty easy to do.
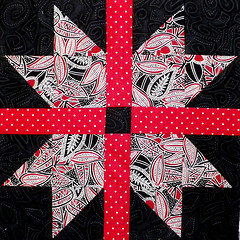
For my block, I printed the foundations at 80% and created a sun with a diameter of 8 inches. I also reduced the amount of background around the block for my 9 inch block. Here are a full-sized block and my resized block for the challenge.
The sun IS a star after all 🙂
Note that I haven’t yet SIGNED my block. I will do that after I’ve removed the foundation from the back, trimmed the seams around the small center circle and pressed everything perfectly flat. If you are making a block for this challenge, don’t forget to sign it before you send it off to Houston.
Resizing foundation patterns is as easy as doing the math to figure out how much they need to be shrunk (or enlarged.)
 Divide the size you want by the size of the paper foundation pattern you want to use and you’ll get the percentage to use to shrink or enlarge the pattern when you print it.
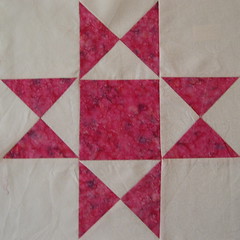
If you wanted to resize the Laced Star block we made in 2003, you would divide 9 (the size you want) by 8 (the size of the block in the pattern) to get 1.125 or 112.5 % the percentage you would use when you printed the foundation pattern.
Resizing pieced patterns is a little more complex, but still easily accomplished. You need to look at the block, identify the number of elements in the grid and recalculate the components based on the size of the block you want.
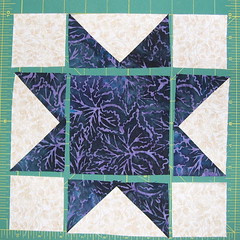
 If you wanted to make an Ohio Star block, like this 12-inch one we made in 2007, you would see that it’s made as a 3-by-3 grid. In the original 12-inch block each component is 1/3 the size of the block or 4 inches. If you wanted to make a 9-inch version, each component would be 3 inches (finished size).
So, instead of cutting 4 1/2 inch squares (for the center and corners) and 5 1/4 inch squares to use to make the quarter square triangles (QST), you’d cut 3 1/2 inch squares and 4 1/4 inch squares.
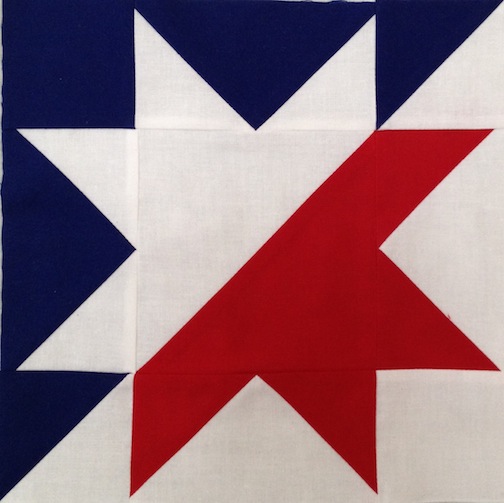
If you want to resize a traditionally pieced block based on a 4 by 4 grid, like my go-to block, the Sawtooth Star, then your new components are 1/4 of the target size, or 2 1/4 inches (finished size).
 For a 9-inch block, you would cut 2 3/4 inch squares for the corner, a 5 inch square for the center and, using your favorite method for making flying geese units with a finished size of 2 1/4 by 4 1/2 inches.
Of course, some of the star blocks we made have made for the lotto were 9 inch blocks … like the Split Star, Star Crossed and the 5-pointed star from 2011.
 |
 |
 |
If you need help resizing one of my block patterns or others, let me know. Believe it or not, I think it’s kind of fun …
Sophie, This is good information. I appreciate you taking time to put this together. 🙂
You mean we are supposed to write on the topside on the fabric? Print or signature? How large do you do that? I am not sure about this. Feels like graffiti.
I have made a blog but my husband (!?!) pointed out that some of my corners don’t meet. Reluctant to send it now. Sigh.