Draw your own Sun Block
The size of the arc which is part of this month’s Sunrise block was determined by the size of a sheet of US letter-sized paper to make it easy to print the foundation pattern.
I intended to put together a tutorial this month, describing how to draw your own pattern, so that you could make a sun, half-sun or quarter sun (AKA New York Beauty block) in any size you needed for other projects. And then, while I was looking for an old photo in my Flickr photo stream, I came across the photos I had taken in March of last year which show how to draw this block. Here’s what the process looks like:
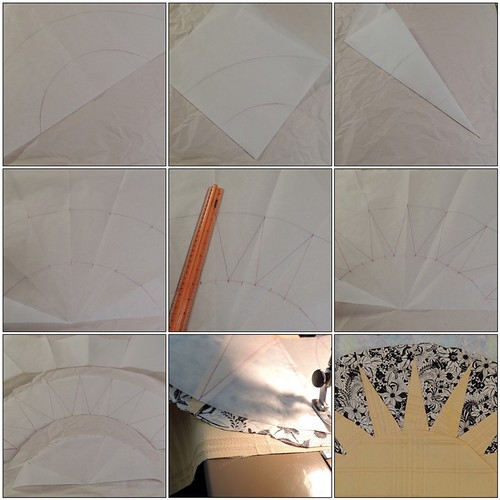
1. 2 Arcs, 2. Folded into quarters, 3. Folded into eighths, 4. Marking the folds, 5. Drawing the sun’s rays,
6. Completed Design, 7. Cut into sections, 8. Foundation piecing on Parchment Paper, 9. Sun section
You can find the blog post describing how I did it: Let the Sun Shine
The Sunrise in this example was part of the tea towel challenge quilt I made in early 2013. To give you an idea of scale, the diameter of the half-sun in our blocks is 10 inches; the sun I created for this quilt was 24 inches wide before it was quilted and washed.

For the lotto, all the arcs should be the same size, but … if you want to use a larger sun–or one with different proportions (a large or smaller half-circle center)–in your mod-mod-sampler, here’s how to do it.
It might seem old-fashioned to use paper, pencil, a compass and ruler, but creating the pattern by hand actually frees you from things that are easily printed or measured.
One for my Sampler
Since I made my bar blocks to look like a sun, decided to make my sun block look like a flower – a purple cornflower with the spindly petals. This was a challenge for me as I am not a fan of paper piecing, but I figured if I keep trying I’ll get better at it. For the life of me I couldn’t sew that center circle, so I machine appliqued it. This one is for my sampler. One more to go.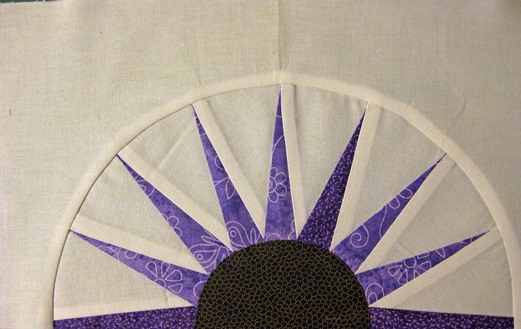
I love the June block!
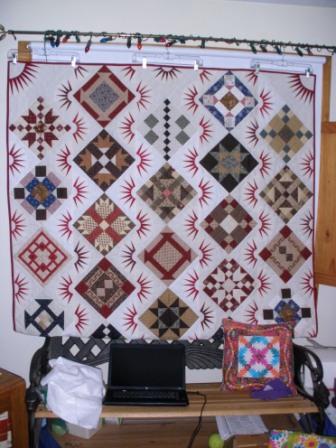
What a perfect block for the month which has long sunny days! I’m posting a BlockSwapper quilt I made 3 years ago with the sunrise block as a setting block. It’s one of the few blocks that I use folded paper piecing. I hate pulling paper off blocks so I fold the paper back and stitch along the edge.
What does Handmade mean to you?
As a woman of a certain age, I can remember when handmade items were not generally valued and the term home made mostly had a bad connotation. A couple decades ago, I remember a (dress) designer friend telling me how she avoided anything that suggested, “loving hands at home.”
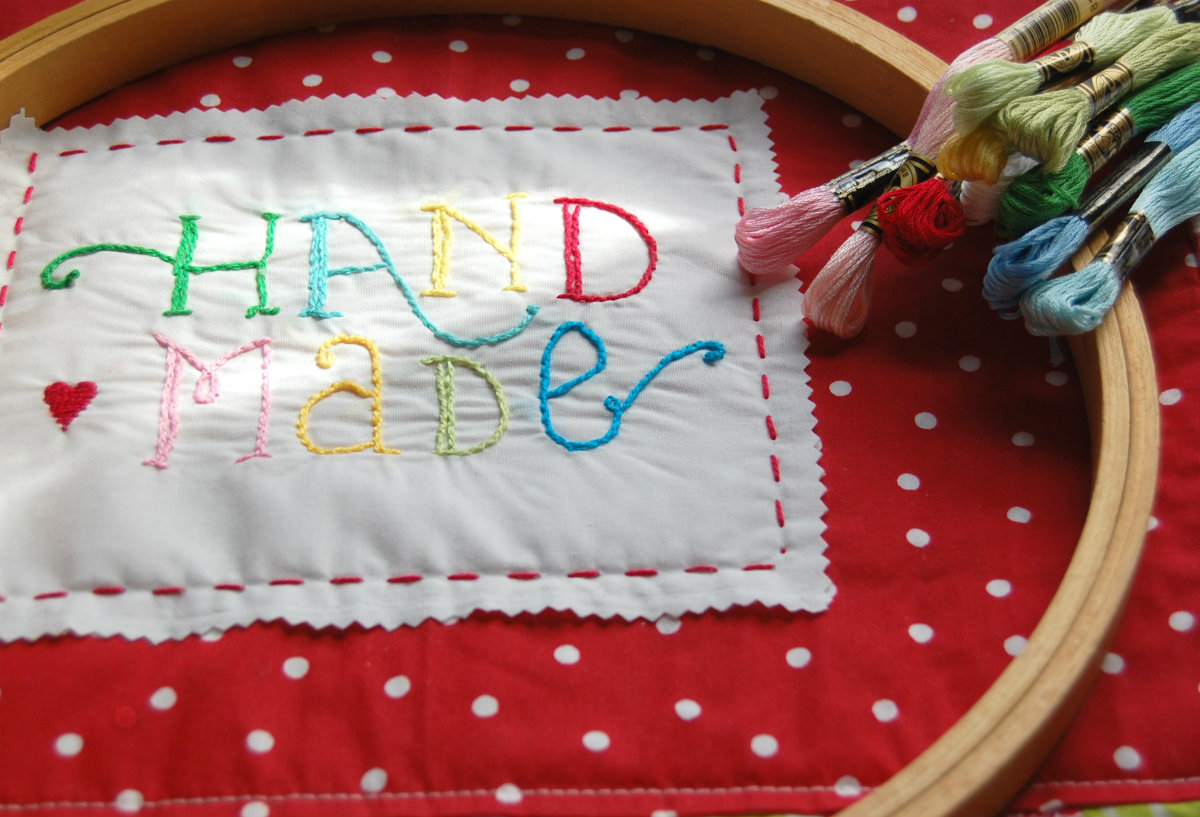
Handmade Stitchery for a Sewing Machine Cover
Times have changed and along with a renewed interest in knitting, quilting and sewing by a younger generation, handmade items have become valued in our culture.
Webster defines hand made as: made by hand or by a hand process
As quilters we create handmade items.
Do you create other handmade things?
Are you a consumer of the handmade products of others?
Do you have observations on the cultural acceptance/appreciate for handmade?
Blog about it in June and add your link below.
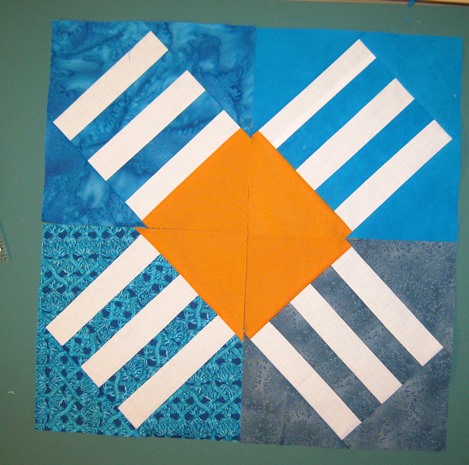
Making the Sunrise Block
 These are the first two sunrise blocks that I made. I thought they would be a good place to start sharing suggestions for techniques and tips for making the blocks. I am starting the conversation with my experience, but I hope that, if you decide to make the block, you’ll also share yours. I’ll use this post to gather our collective experiences as encouragement and help for those that may be feeling a little intimidated.
For the block on the left:
- The arc was paper foundation pieced.
- The half-circle center was machine appliquéd
- The outer background was added using the 6-minute circle technique.
For the block on the right:
The seams were drawn onto fabric and the block was hand-pieced.
Paper Foundation Piecing the Arc
For both hand-piecing and paper foundation piecing on the machine, the concept of “sewing on the line” creates accurately sewn rays of the sun.
When paper piecing something like this with the same shape repeated multiple times, I like to work with strips of fabric–for this block, I used a 4-inch wide strip of background and 4 1/2-inch strip for the rays. You can also precut the fabrics. This tutorial shows you how to decide how big to cut the pieces and shows how to paper piece a similar shape:
Adding the Outer Background
The New York Beauty tutorial includes tips for pinning and sewing the outside curve–sewing a half-circle really is as easy as sewing a quarter circle twice … and for those of you who inset a whole circle when you made the February Bead-on-a-String blocks, this is just half of that process.
You can also appliqué the background onto the pieced arc or vice versa. I personally find it easier to reverse appliqué the background (without seams) onto the pieced arc, but it works bother ways.
Since I tried Dale Fleming’s 6-Minute Circle in February, I have become a fan. Then Marie posted a tutorial on her blog with a slight change that I think makes it EVEN EASIER. Marie’s tutorial is here:
Marie’s Creative Space: Circle Tutorial
Marie doesn’t remove the freezer paper until after the seam is sewn and I think it’s brilliant. It makes it easy to see where you want to sew and you don’t stress the glued-together layers by removing it before it’s sewn.
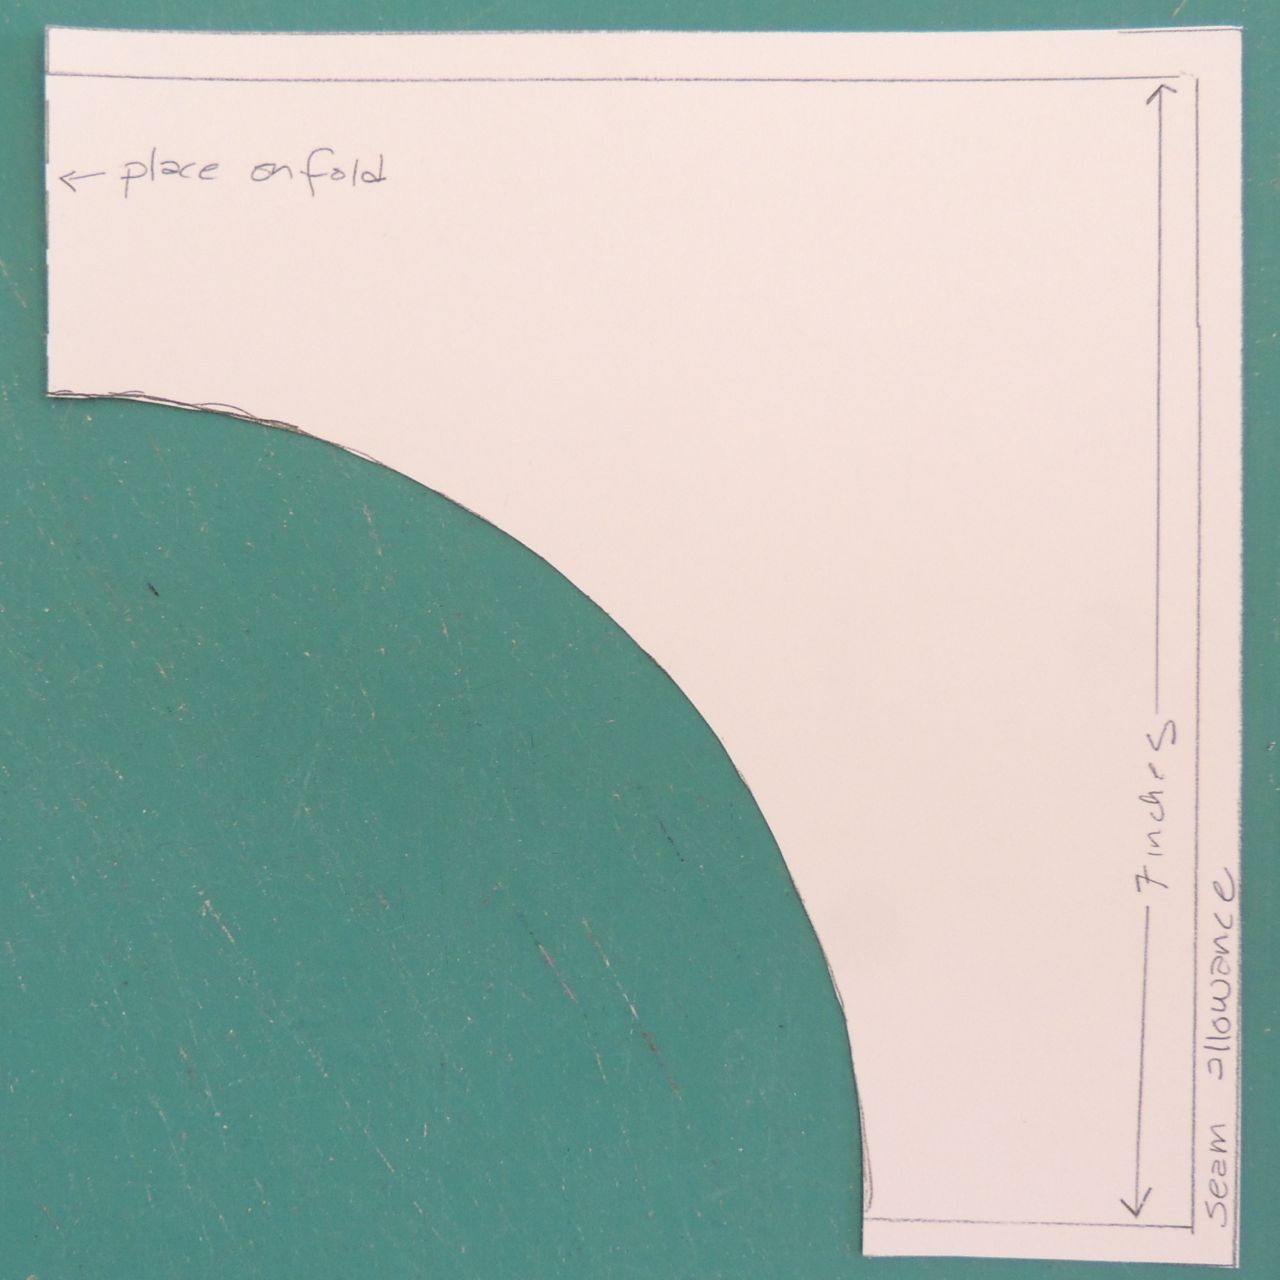 To prepare the freezer paper template you’ll need to use the 6 minute circle technique, cut the background template, including the seam allowance on the outside, but cutting the curve ON the seam line.
(I printed my templates on card stock to make them stiff and easy to use.)
After you have put together two layers of freezer paper, cut it into a rectangle 7 1/2 by 14 1/2 inches. use the template to mark the curve on each side (or fold the doubled freezer paper in half so you can mark one side and cut both sides at once.)

If you fall in love with this technique as I have, you might want to check out the book–clicking the image will take you to Amazon.
I used the cut-out of the double-freezer paper to make a template to prepare the half-circle for appliqué … and since the glue stick was out, I used it to hold the turned back seam allowance along the curve in place … and to place the appliqué on the pieced arc. I used my machine’s blanket stitch and a matching thread color to stitch the appliqué in place.
Hand-Piecing the Block
I’m a pretty good machine piecer, but I would be hesitant to piece the arc in this block in a traditional way because there are 16 seams from edge to edge, BUT, I knew I could hand-piece it because by tracing the finished size shapes onto the back of my fabric and sewing on the line, I was confident the result would be accurate.
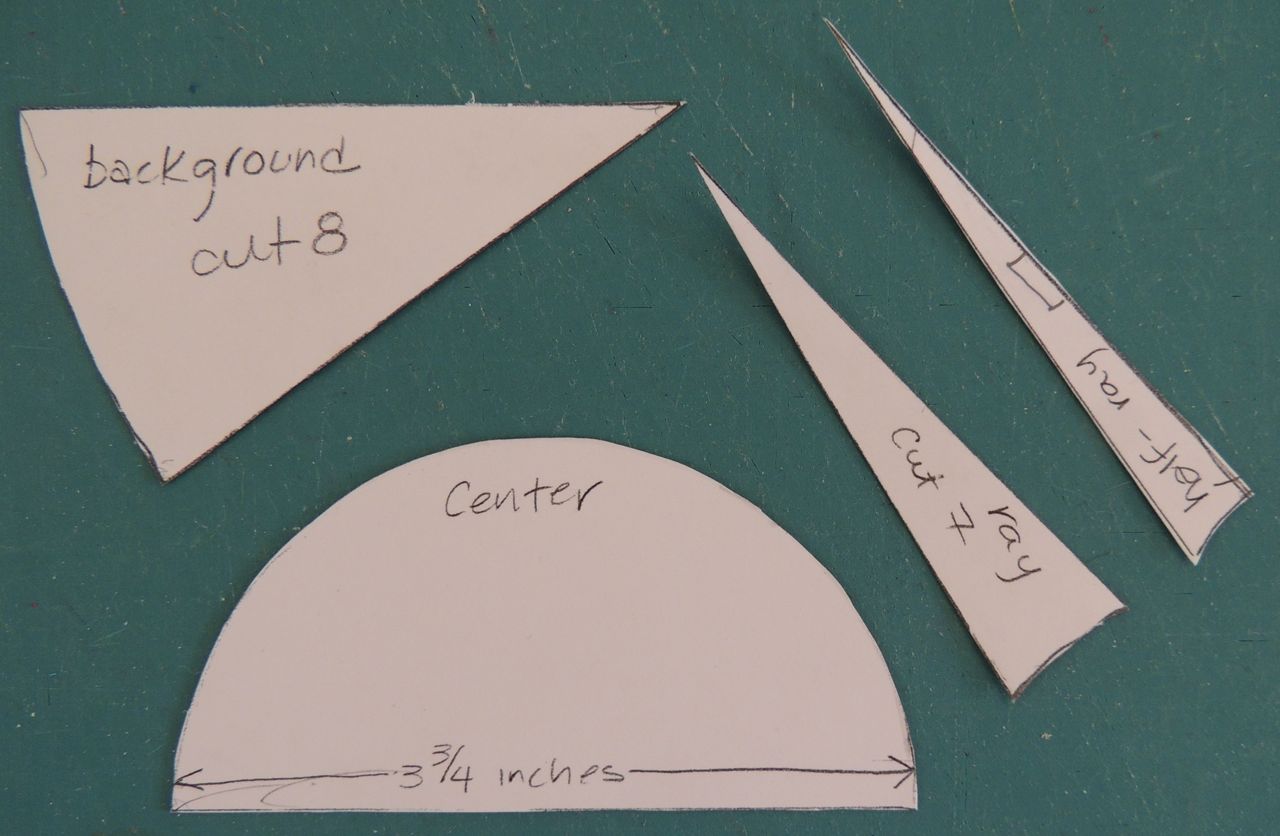 To start, I printed the templates on card stock and them carefully cut them out ON the line.
I used them to trace the finished shape onto the back of my chosen fabrics, then cut, adding roughly 1/4 inch seam allowance–this does not have to exact because you will be matching up the seam lines and sewing on the line.
This tutorial covers the basics of hand-piecing using the sewing on the line approach:
If you try hand piecing and find it as relaxing as I do, you might want to keep an eye on my blog, Sophie Junction, and watch for my summer project. If all goes well, it will be kicking off later this month.
For more information about quilt making by hand, Jinny Beyer’s book with the same is the bible of the technique. Helen was able to find the book in her local library.

You can also find many patterns for blocks well-suited to hand piecing on her site here:
Jinny Beyer Studio: Free Block Patterns
Your turn
If you have questions about making the blocks, or answers, suggestions, or alternative techniques to use, please add them to the comment.
My latest Mod Mod QAL blocks

Here are at the 9 blocks I need for the queen-sized quilt. The color’s a bit off, but they’re blue-and-white. I’m waiting until Sophie posts the June block before I make the May blocks for this quilt, because I can’t decide if they should be blue-on-white or white-on-blue.
Still having fun!
My sampler grows
I’ve made the four for my sampler. Wish now had used more white like Sophie’s.
Next month, I’ll lay them out with the other 1/4 to see what to make them from as Sophie mentioned.
Sophie’s QAL Progress
I cannot believe we’re almost half-way done … except for the putting it all together, deciding on a quilting design and quilting it, of course 😉
I learned from my mistake last month and pulled out everything I’ve done so far before choosing fabrics this month. This time, I am second-guessing a choice I made in an earlier month and may still end up re-making blocks–I am reserving judgement for a couple more months to see what happens.
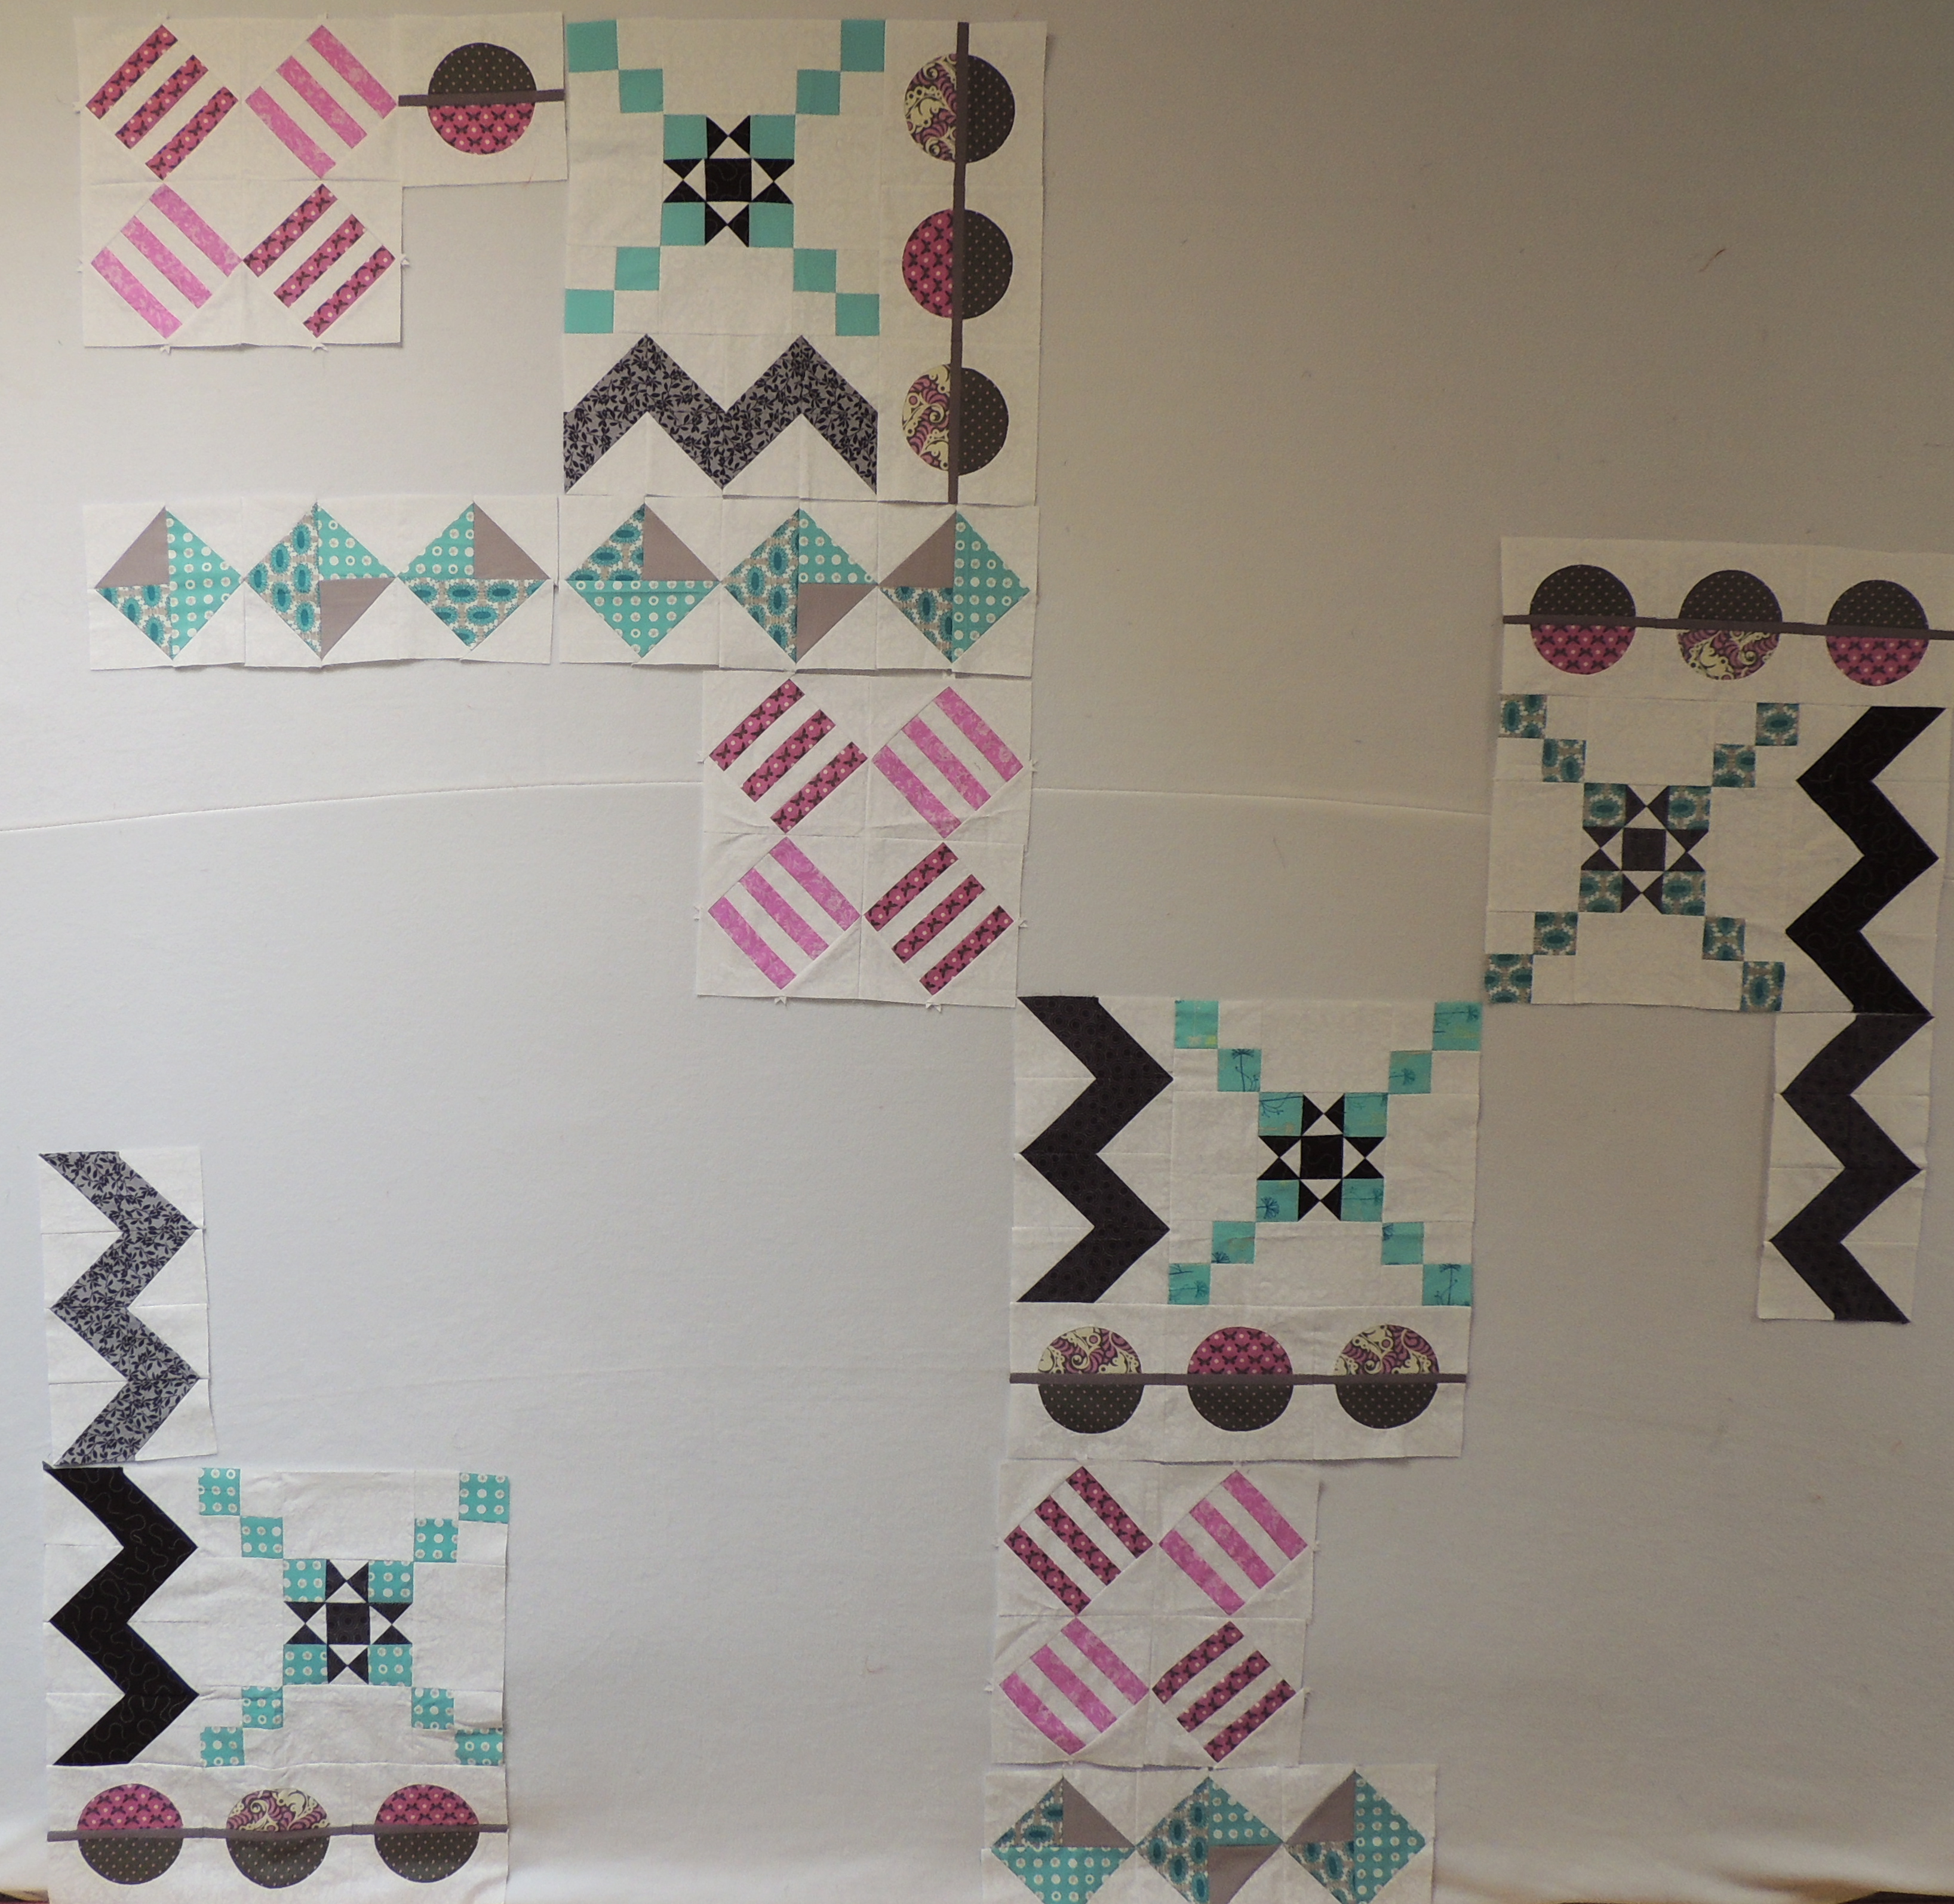
Here are the blocks for my Queen-size quilt.
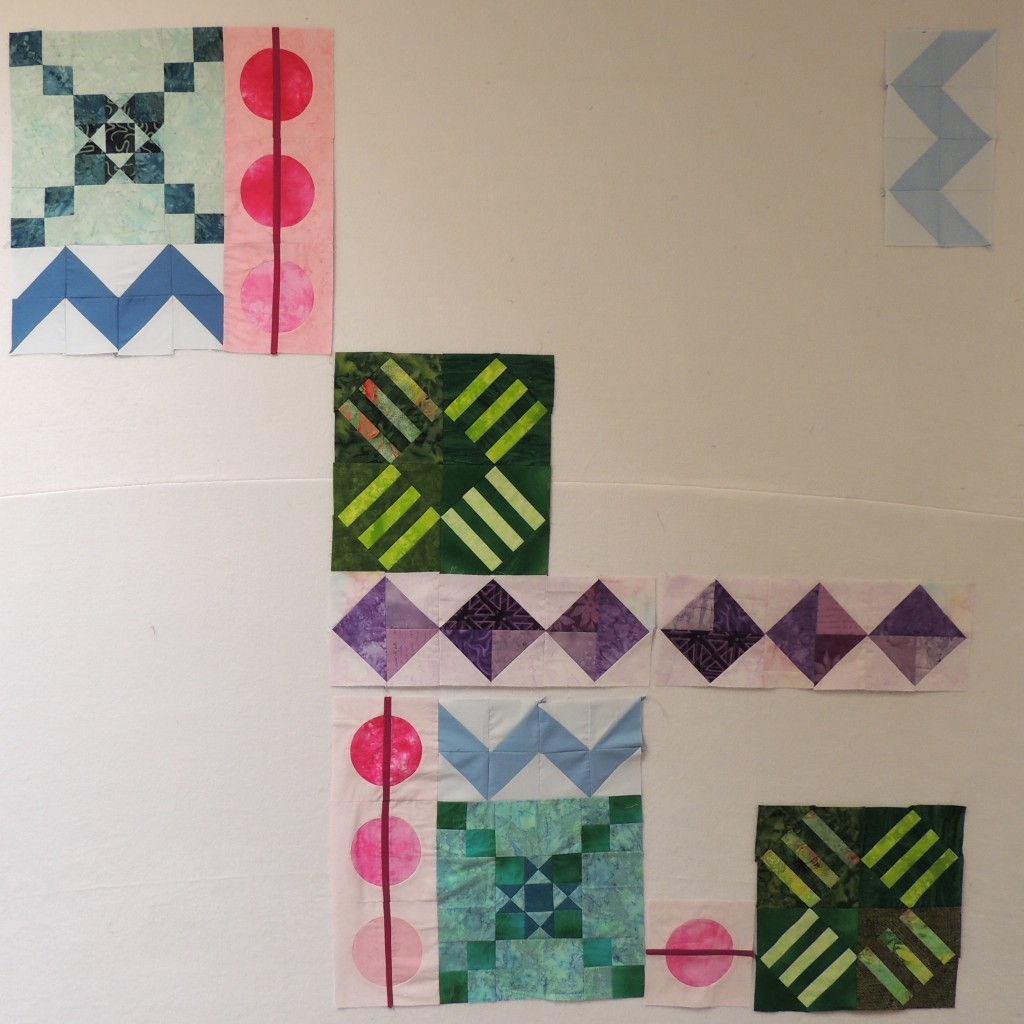
And the Rainbow Scraps version, Throw-sized.
I meant to put the blocks on the wall in their relative position, but I’ve clearly flipped something around here … but you get the idea 🙂
Edited to add …
Mariella’s comment reminded me that I meant to include all the links for the monthly updates from the beginning for anyone who is thinking about starting a Mod-Mod sampler of their own:
Introduction and January update: It’s a Mod-Mod Quilt-Along
February update – Mod-Mod Quilt-Along
March update – Mod-Mod Quilt-Along
April update – Mod-Mod Quilt-Along
Three segments done
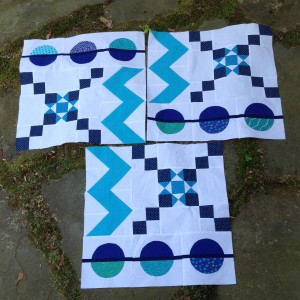
I am really liking how this is coming together! Sophie, do you think this quilt could be made as a quilt-as-you-go quilt? Would your design be messed up if these larger segments were to have a 1/2-inch sashing between them in final quilt? It’s just a thought…..I’ve seen several of them lately and was thinking about trying one.
My sampler progress
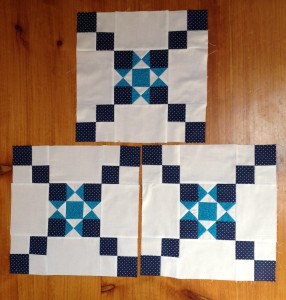 Here are 3 of the the 4 Star Chain blocks (February) I made for my sampler quilt. Unfortunately, I spilled a little coffee on the 4th one as I was getting ready to take the photo, and had to do a quick rinse job on it. It’s now out in the sun drying, and I hope will soon be as good as new.
So I’ve got 3 of the 5 months done and I just noticed from Sophie’s diagram for the queen size sampler that I have enough to assemble some little sections of the quilt already. I’m going to go try to sew one together, and I’ll post another photo if I’m successful.